Quick Start
This section will help you get your LAFVIN ESP32S3 AIChatBot up and running in just a few minutes.
Before you begin, prepare your ESP32S3 board and a USB Type-C data cable that supports data transfer.
Warning
Make sure you are using a USB Type-C cable that supports data transfer. Some charging-only cables can power the board but cannot be used for flashing or serial communication.
Choose Your Firmware
This project provides two firmware options:
Xiaozhi AI firmware: Offers more complete built-in features, supports the Xiaozhi backend, and is free to use. However, it requires you to register an account with a mobile phone number.
ChatGPT firmware: A good alternative if you have privacy concerns about mobile phone registration. However, it requires an OpenAI account and paid API balance in order to create and use an API key.
If you want the fastest ready-to-use experience, we recommend Xiaozhi AI firmware. If you prefer to avoid mobile phone registration, choose the ChatGPT firmware instead.
If you want to use the ChatGPT firmware, please refer to ChatGPT Tutorial for the remaining firmware flashing and configuration steps.
If you want to use the Xiaozhi AI firmware, continue with the steps below.
Quick Setup
Step 1: Install the Driver
Install the CP210x USB-to-UART driver for your operating system:
Step 2: Flash the Firmware Online
Use the online flashing tool below to flash the firmware directly to your device. This method does not require you to download a separate flashing tool or firmware package in advance.
Step 3: Configure Wi-Fi and the Backend
Note
The ESP32-S3 supports only 2.4 GHz Wi-Fi networks. Make sure the Wi-Fi network you choose is not 5 GHz only.
After the device powers on, it will automatically enter Wi-Fi provisioning mode.
On your phone, search for and connect to the hotspot named
Xiaozhi-XXXX.A Wi-Fi configuration page will open automatically. Enter your local Wi-Fi name and password, then tap Save.
The device will restart and prompt you to complete device binding with a verification code.
Next, go to the Xiaozhi backend at https://xiaozhi.me/ and register an account.


After creating the account, go to the console and create an agent. Then click Add Device, enter the 6-digit verification code provided by the device, and the device will restart automatically. After that, you can start a normal conversation.


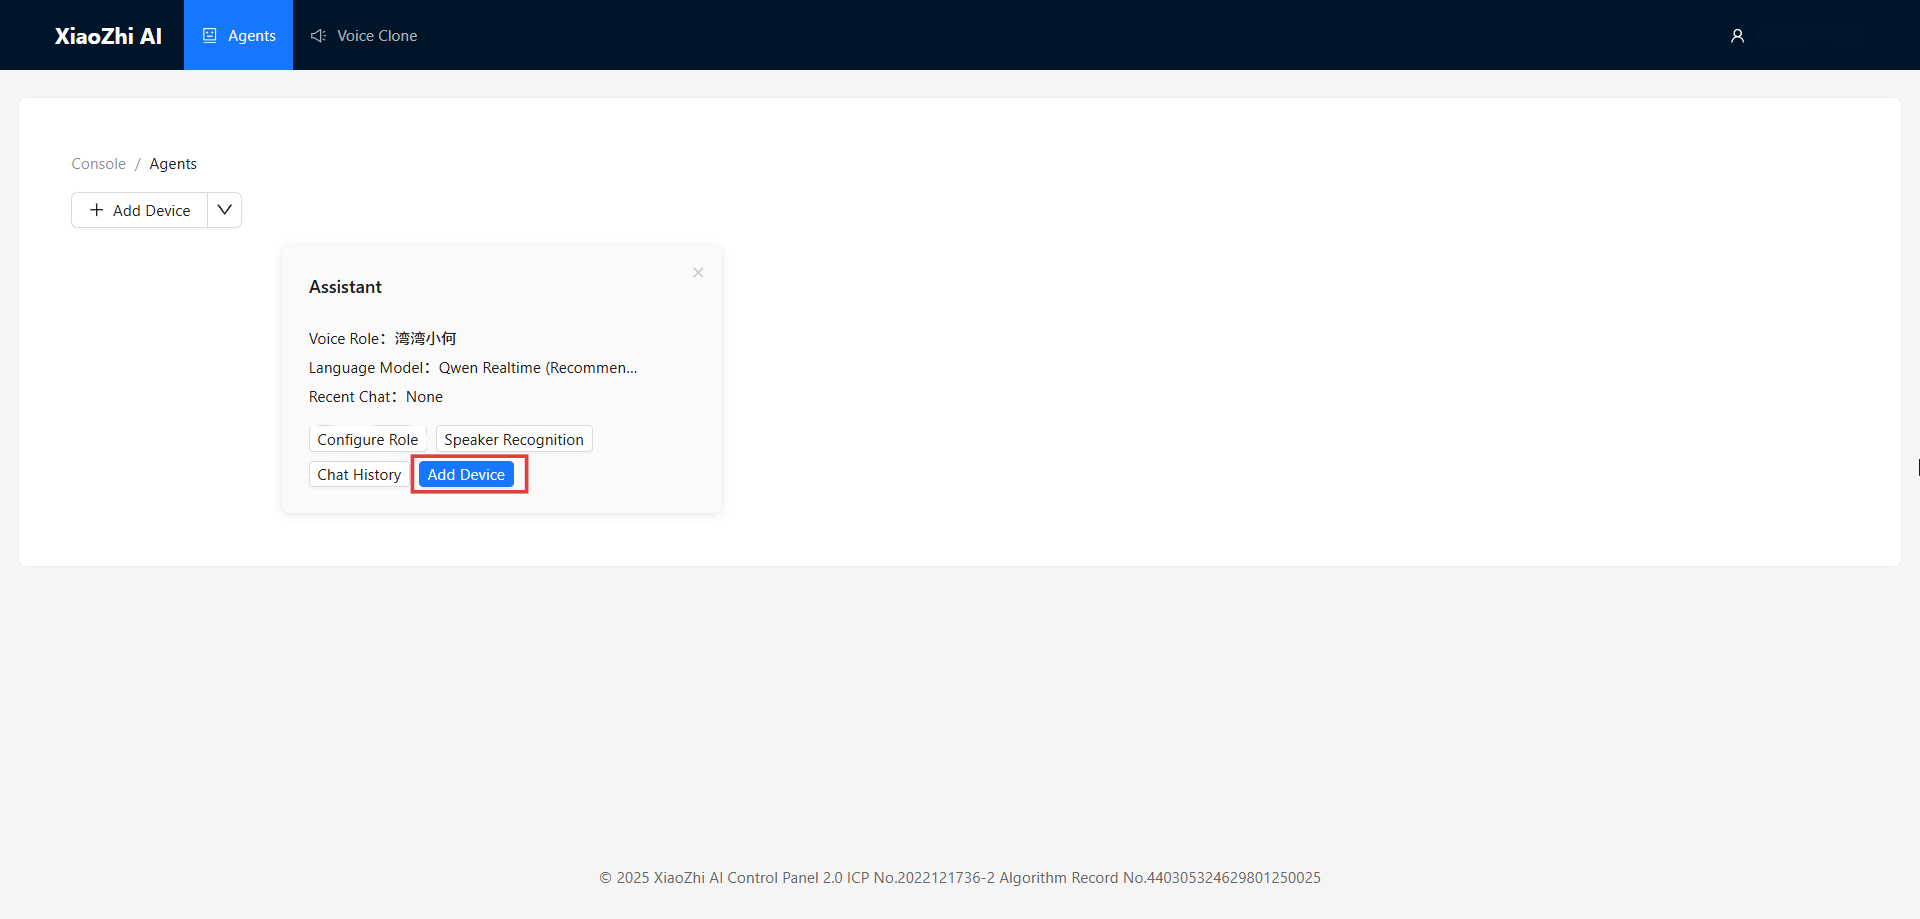

Of course, you can also click the Configure Role button to configure the agent parameters:
Assistant Name: Name your AI assistant
Voice Role: Select your preferred voice style
Language Preference: Set the conversation language
Role Introduction: Define the personality traits of the AI assistant
Language Model: Select the language model to use
- Below is a sample prompt that you can modify according to your needs:
I am a virtual assistant called {{assistant_name}}. I communicate exclusively in English with a natural, friendly voice. I provide helpful, accurate information and assist users with their queries while maintaining a conversational tone. I adapt my speaking style to match the user's needs and always aim to deliver clear, concise responses in fluent English.


First Use
After the device is connected to the network, you can press the wake button or say Hi, ESP or Sophia to start a voice conversation.
